WATER PUMP (for Hatchback) > REMOVAL |

for Preparation Click here
| 1. DISCONNECT CABLE FROM NEGATIVE BATTERY TERMINAL |
| 2. DRAIN COOLANT |
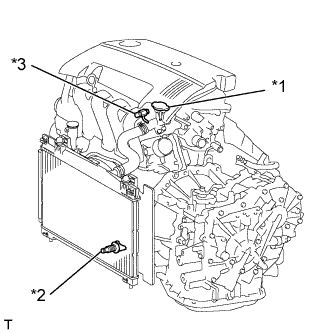 |
- NOTICE:
- To avoid the danger of being burned, do not remove the water filler cap sub-assembly while the engine and radiator assembly are still hot. Thermal expansion will cause hot coolant and steam to blow out from the radiator assembly.
| *1 | Water Filler Cap Sub-assembly |
| *2 | Radiator Drain Cock Plug |
| *3 | Cylinder Block Drain Cock Plug |
Loosen the radiator drain cock plug.
Remove the water filler cap sub-assembly.
Loosen the cylinder block drain cock plug, then drain the coolant.
| 3. REMOVE ENGINE UNDER COVER RH |
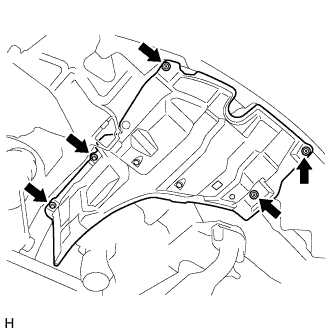 |
Remove the 3 screws, 2 bolts and the engine under cover RH.
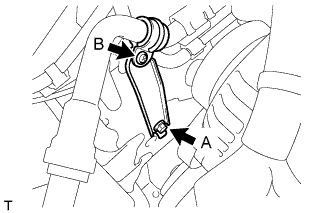
| 4. REMOVE FAN AND GENERATOR V BELT |
Loosen bolts A and B.
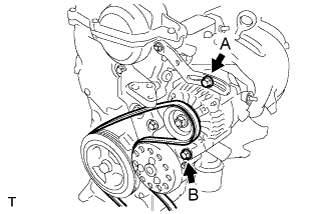 |
Release the fan and generator V belt tension and remove the fan and generator V belt.
| 5. REMOVE GENERATOR ASSEMBLY |
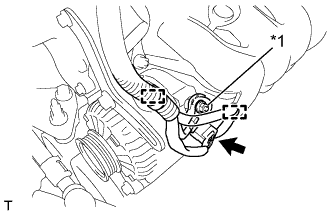 |
Remove the terminal cap.
Disconnect the connector and the harness clamp.
Remove the nut and disconnect the wire harness from terminal B.
Text in Illustration *1 Terminal B
Remove the belt adjusting slider fixing bolt A, nut B and the belt adjusting slider.
 |
Remove the bolt A, screw B and the piping clamp.
 |
Remove the fixing bolt and the generator assembly.
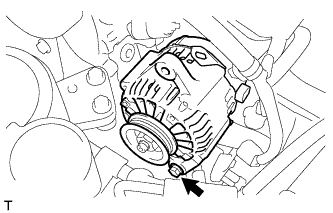 |
| 6. REMOVE ENGINE MOUNTING INSULATOR SUB-ASSEMBLY RH |
- HINT:
- Only perform this procedure when replacement of the engine mounting insulator RH is necessary.
Remove the 3 bolts and engine mounting insulator RH.
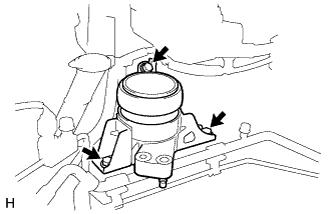 |
| 7. REMOVE WATER PUMP PULLEY |
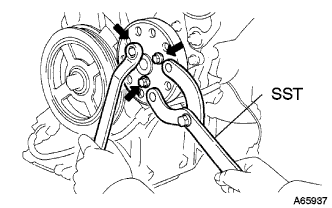 |
Using SST, hold the water pump pulley.
- SST
- 09960-10010
(09962-01000, 09963-00700)
Remove the 3 bolts and the water pump pulley.
| 8. REMOVE WATER PUMP ASSEMBLY |
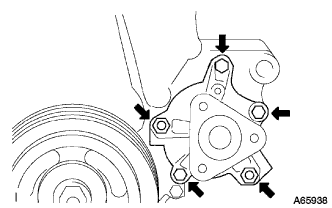 |
Remove the 3 bolts, 2 nuts the water pump assembly and water pump gasket.