STEREO JACK ADAPTER ASSEMBLY (for Floor Shift Type) > REMOVAL |

for Preparation Click here
| 1. PRECAUTION |
- NOTICE:
- After turning the ignition switch off, waiting time may be required before disconnecting the cable from the battery terminal. Therefore, make sure to read the disconnecting the cable from the battery terminal notice before proceeding with work. (Click here).
| 2. DISCONNECT CABLE FROM NEGATIVE BATTERY TERMINAL |
| 3. REMOVE FRONT DOOR SCUFF PLATE LH |
for Double Cab:
Remove the front door scuff plate LH (Click here).
for Regular Cab:
Remove the front door scuff plate LH (Click here).
for CrewMax:
Remove the front door scuff plate LH (Click here).
| 4. REMOVE COWL SIDE TRIM BOARD LH |
 |
Remove the clip.
Detach the 2 clips and remove the cowl side trim board.
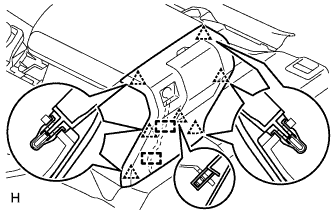
| 5. REMOVE INSTRUMENT SIDE PANEL LH |
Using a moulding remover, detach the 7 claws and remove the side panel.
 |
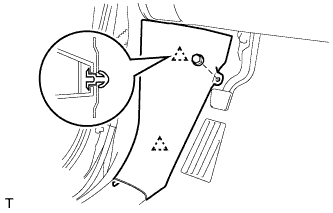
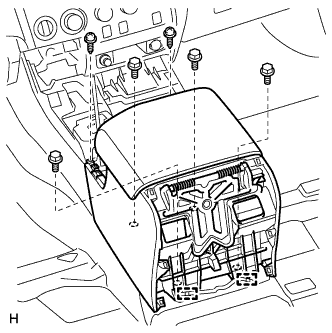
| 6. REMOVE LOWER INSTRUMENT PANEL FINISH PANEL SUB-ASSEMBLY LH |
Remove the hood lock control lever.
 |
Remove the 2 bolts.
Detach the 9 clips and claw.
for Automatic Air Conditioning System:
Detach the 2 claws and remove the sensor.
 |
Remove the finish panel and then disconnect the connectors.
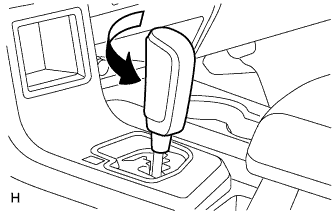
| 7. REMOVE SHIFT LEVER KNOB SUB-ASSEMBLY |
Twist the shift lever knob in the direction indicated by the arrow and remove it.
 |
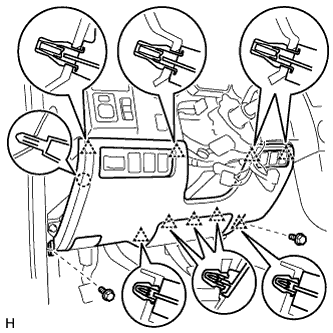
| 8. REMOVE UPPER CONSOLE PANEL SUB-ASSEMBLY |
Detach the 12 clips and remove the console panel.
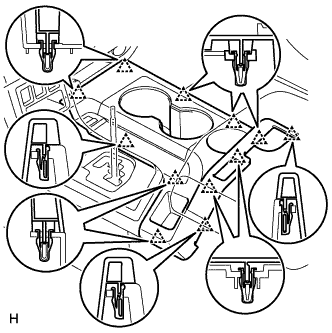 |
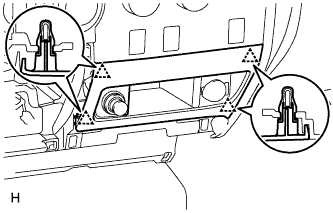
| 9. REMOVE REAR UPPER CONSOLE PANEL SUB-ASSEMBLY |
Remove the clip.
Detach the 6 clips and remove the console panel.
w/ Trailer Towing System:
Disconnect the connector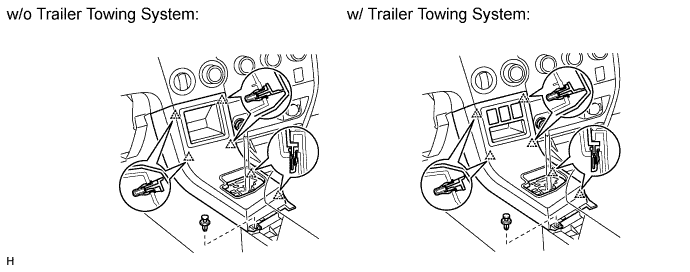
| 10. REMOVE REAR CONSOLE END PANEL SUB-ASSEMBLY |
Using a moulding remover, detach the 7 clips and remove the end panel.
 |
except Regular Cab:
Detach the 2 wire harness clamps and disconnect the connector.
| 11. REMOVE CONSOLE BOX CARPET |
| 12. REMOVE REAR CONSOLE BOX ASSEMBLY |
Remove the 2 screws.
 |
Detach the 2 wire harness clamps.
Remove the 4 bolts and rear console box.
| 13. REMOVE FRONT CONSOLE BOX |
Remove the 2 clips.
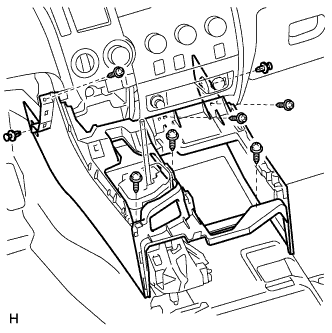 |
Remove the 6 screws and front console box.
| 14. REMOVE INSTRUMENT CLUSTER FINISH PANEL ASSEMBLY |
Disconnect the connector and detach the wire harness clamp.
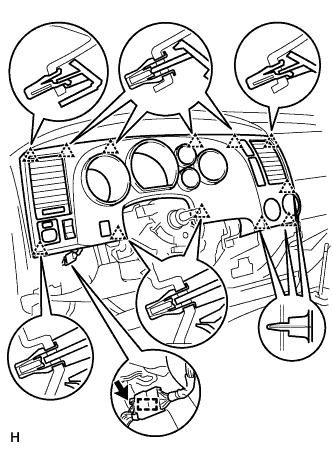 |
Detach the 12 clips and remove the finish panel.
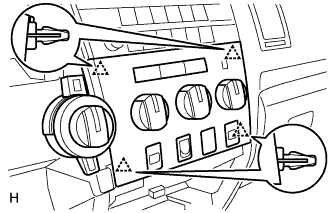
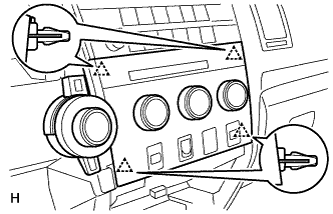
| 15. REMOVE CENTER LOWER INSTRUMENT PANEL FINISH PANEL |
Detach the 4 clips and remove the finish panel.
 |
Disconnect the connectors.
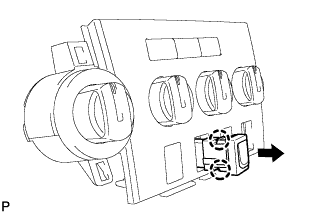
| 16. REMOVE INTEGRATION CONTROL AND PANEL ASSEMBLY (for Manual Air Conditioning System) |
Detach the 4 clips and remove the panel.
 |
Disconnect the connectors.
| 17. REMOVE INTEGRATION CONTROL AND PANEL ASSEMBLY (for Automatic Air Conditioning System) |
Detach the 4 clips and remove the panel.
 |
Disconnect the connectors.
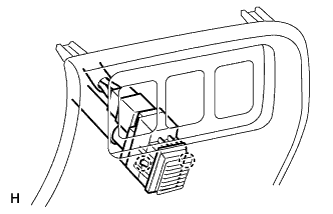
| 18. REMOVE STEREO JACK ADAPTER ASSEMBLY |
 |
Detach the 2 claws and remove the adapter.