INSTRUMENT PANEL SPEAKER (for CrewMax) > INSTALLATION |

for Preparation Click here
| 1. INSTALL FRONT NO. 4 SPEAKER ASSEMBLY (for 12 Speakers) |
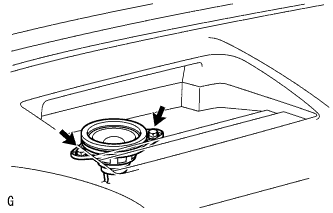 |
Connect the connector.
Temporarily install the speaker by aligning the positioning pins of the speaker with the instrument panel.
Install the speaker with the 2 bolts.
- NOTICE:
- Do not touch the cone part of the speaker.
- When installing the speaker to the instrument panel, be careful that the wires do not get caught between the parts.
| 2. INSTALL NO. 3 INSTRUMENT PANEL SPEAKER PANEL SUB-ASSEMBLY |
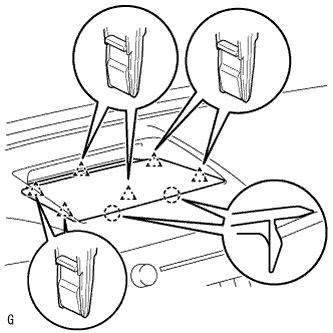 |
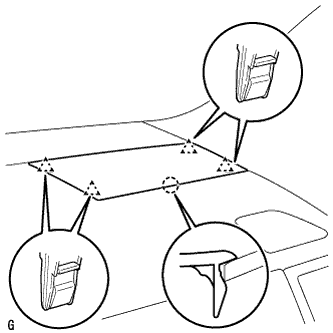
Attach the 6 clips and 2 claws to install the speaker panel.
| 3. INSTALL FRONT NO. 2 SPEAKER ASSEMBLY RH |
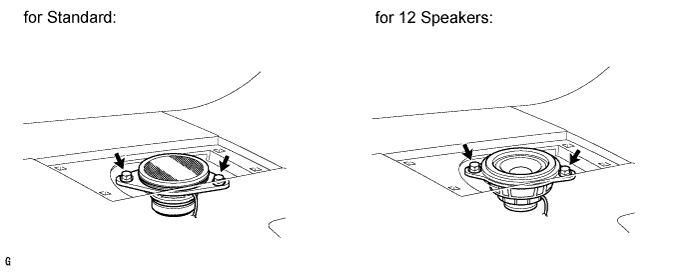
Connect the speaker connector.
Temporarily install the speaker by aligning the positioning pins of the speaker with the instrument panel.
Install the speaker with the 2 bolts.
- NOTICE:
- Do not touch the cone part of the speaker.
- When installing the speaker to the instrument panel, be careful that the wires do not get caught between the parts.
| 4. INSTALL FRONT NO. 2 SPEAKER ASSEMBLY LH |
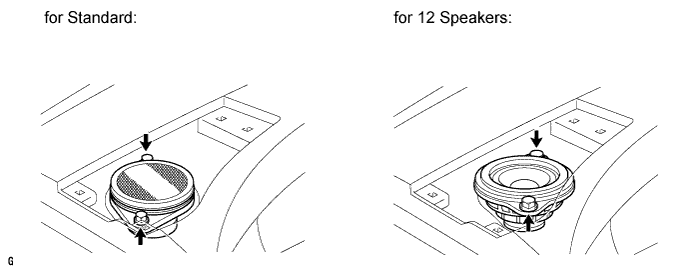
Connect the speaker connector.
Temporarily install the speaker by aligning the positioning pins of the speaker with the instrument panel.
Install the speaker with the 2 bolts.
- NOTICE:
- Do not touch the cone part of the speaker.
- When installing the speaker to the instrument panel, be careful that the wires do not get caught between the parts.
| 5. INSTALL NO. 2 INSTRUMENT PANEL SPEAKER PANEL SUB-ASSEMBLY |
 |
Attach the 4 clips and claw to install the speaker panel.
| 6. INSTALL NO. 1 INSTRUMENT PANEL SPEAKER PANEL SUB-ASSEMBLY |
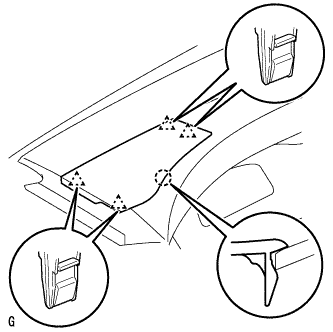 |
Attach the 4 clips and claw to install the speaker panel.
| 7. INSTALL FRONT PILLAR GARNISH RH |
- HINT:
- Use the same procedures described for the LH side.
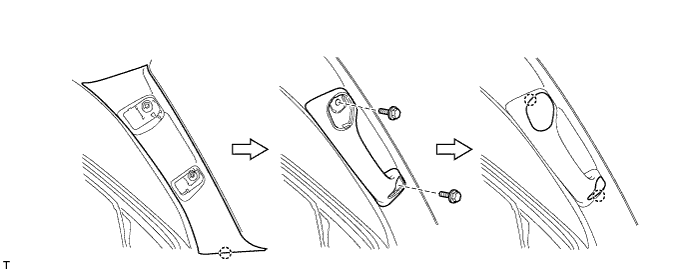
| 8. INSTALL FRONT PILLAR GARNISH LH |
Attach the claw to install the front pillar garnish.
Install the assist grip with the 2 bolts.
Attach the 2 claws to install the 2 assist grip plugs.
| 9. CONNECT CABLE TO NEGATIVE BATTERY TERMINAL |