RADIO RECEIVER (for Floor Shift Type) > INSTALLATION |

for Preparation Click here
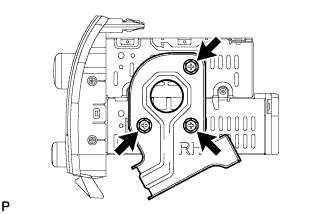
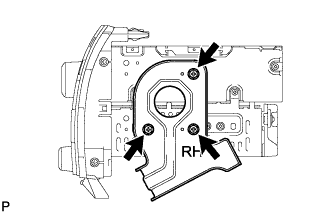
| 1. INSTALL NO. 2 RADIO BRACKET (w/ USB Audio System) |
Install the bracket with the 3 bolts.
 |
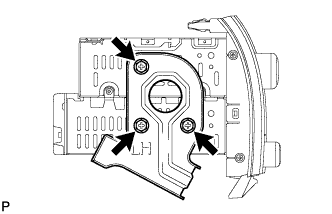
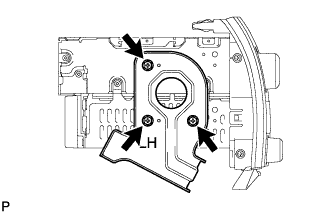
| 2. INSTALL NO. 1 RADIO BRACKET (w/ USB Audio System) |
Install the bracket with the 3 bolts.
 |
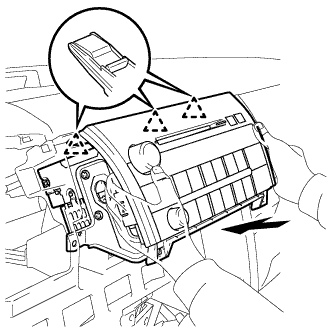
| 3. INSTALL RADIO RECEIVER ASSEMBLY WITH BRACKET (w/ USB Audio System) |
Connect the connectors.
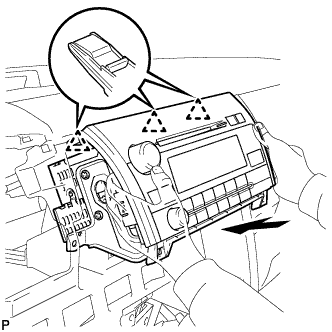 |
Insert the radio receiver and attach the 3 clips on its backside.
- NOTICE:
- When inserting the radio receiver, do not press its knobs.
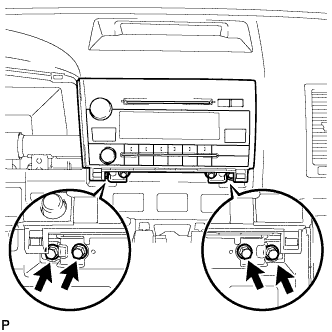
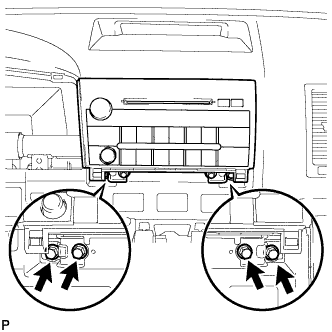
Install the radio receiver with the 4 bolts.
 |
| 4. INSTALL NO. 2 RADIO BRACKET (w/o USB Audio System) |
Install the bracket with the 3 bolts.
 |
| 5. INSTALL NO. 1 RADIO BRACKET (w/o USB Audio System) |
Install the bracket with the 3 bolts.
 |
| 6. INSTALL RADIO RECEIVER ASSEMBLY WITH BRACKET (w/o USB Audio System) |
Connect the connectors.
 |
Insert the radio receiver and attach the 3 clips on its backside.
- NOTICE:
- When inserting the radio receiver, do not press its knobs.
Install the radio receiver with the 4 bolts.
 |
| 7. INSTALL INTEGRATION CONTROL AND PANEL ASSEMBLY (for Manual Air Conditioning System) |
Connect the connectors.
 |
Attach the 4 clips to install the panel.
| 8. INSTALL INTEGRATION CONTROL AND PANEL ASSEMBLY (for Automatic Air Conditioning System) |
Connect the connectors.
 |
Attach the 4 clips to install the panel.
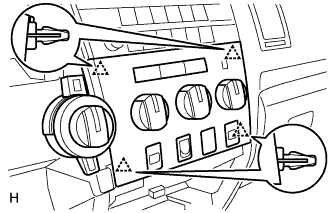
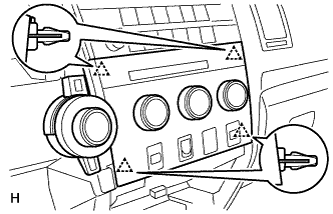
| 9. INSTALL CENTER LOWER INSTRUMENT PANEL FINISH PANEL |
Connect the connectors.
 |
Attach the 4 clips to install the finish panel.
| 10. INSTALL INSTRUMENT CLUSTER FINISH PANEL ASSEMBLY |
Attach the 12 clips to install the finish panel.
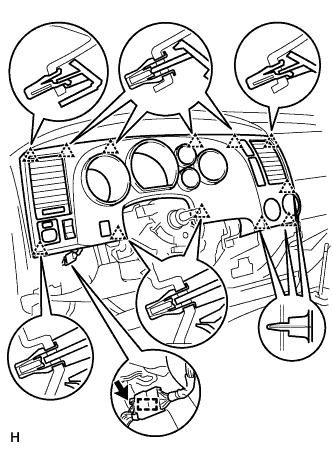 |
Connect the connector and attach the wire harness clamp.
| 11. INSTALL FRONT CONSOLE BOX |
Install the front console box with the 6 screws and 2 clips.
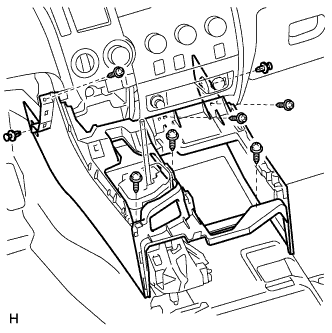 |
| 12. INSTALL REAR CONSOLE BOX ASSEMBLY |
Install the rear console box with the 2 screws and 4 bolts.
 |
Attach the 2 wire harness clamps.
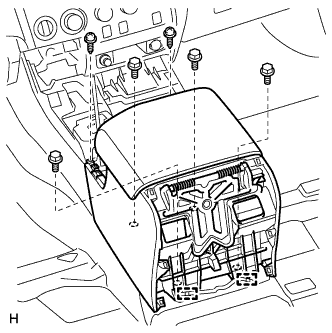
| 13. INSTALL CONSOLE BOX CARPET |
Install the carpet.
| 14. INSTALL REAR CONSOLE END PANEL SUB-ASSEMBLY |
except Regular Cab:
Attach the 2 wire harness clamps and connect the connector.
 |
Attach the 7 clips to install the end panel.
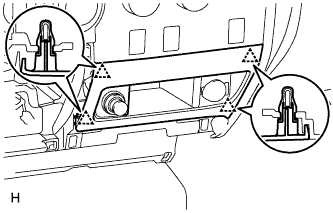
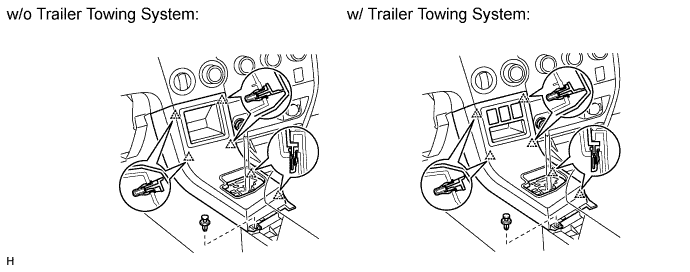
| 15. INSTALL REAR UPPER CONSOLE PANEL SUB-ASSEMBLY |
w/ Trailer Towing System:
Connect the connector.
Attach the 6 clips to install the console panel.
Install the clip.
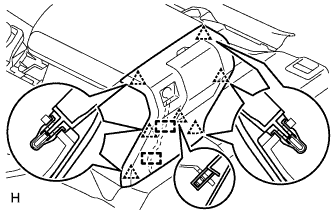
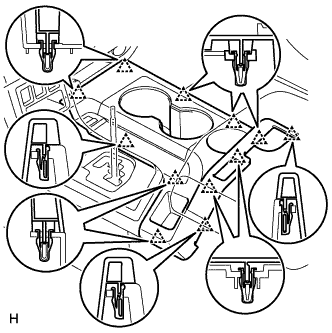
| 16. INSTALL UPPER CONSOLE PANEL SUB-ASSEMBLY |
Attach the 12 clips to install the console panel.
 |
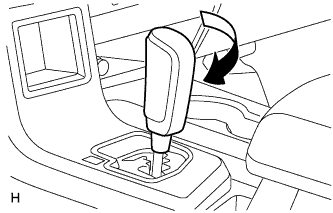
| 17. INSTALL SHIFT LEVER KNOB SUB-ASSEMBLY |
Install the shift lever knob and twist it in the direction indicated by the arrow.
 |
| 18. INSTALL LOWER INSTRUMENT PANEL FINISH PANEL SUB-ASSEMBLY LH |
for Automatic Air Conditioning System:
Attach the 2 claws to install the sensor.
 |
Connect the connectors.
 |
Attach the 9 clips and claw to install the finish panel.
Install the 2 bolts.
Install the hood lock control lever.
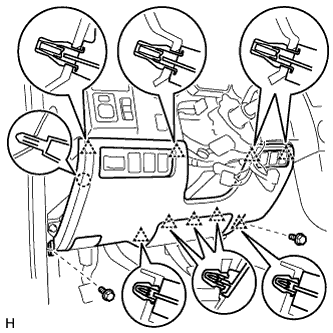
| 19. INSTALL INSTRUMENT SIDE PANEL LH |
Attach the 7 claws to install the side panel.
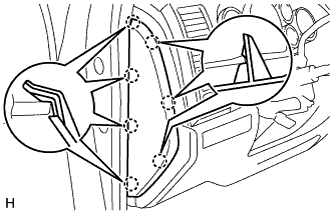 |
| 20. INSTALL COWL SIDE TRIM BOARD LH |
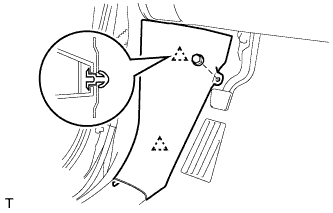 |
Attach the 2 clips to install the cowl side trim board.
Install the clip.
| 21. INSTALL FRONT DOOR SCUFF PLATE LH |
for Double Cab:
Install the front door scuff plate LH (Click here).
for Regular Cab:
Install the front door scuff plate LH (Click here).
for CrewMax:
Install the front door scuff plate LH (Click here).
| 22. CONNECT CABLE TO NEGATIVE BATTERY TERMINAL |