CENTER POWER OUTLET SOCKET (for Floor Shift Type) > REMOVAL |

for Preparation Click here
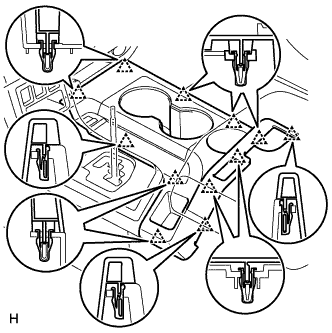
| 1. REMOVE UPPER CONSOLE PANEL SUB-ASSEMBLY |
Detach the 12 clips and remove the console panel.
 |
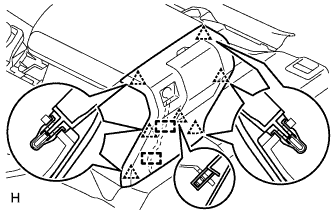
| 2. REMOVE CONSOLE BOX BEZEL |
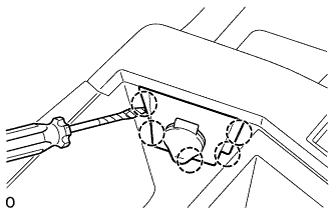 |
Disconnect the connector.
Using a screwdriver, detach the 5 claws and remove the console box bezel.
- HINT:
- Tape the screwdriver tip before use.
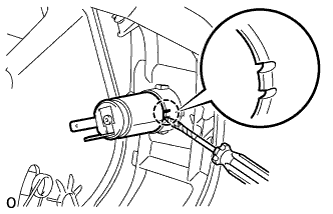
| 3. REMOVE POWER OUTLET SOCKET ASSEMBLY |
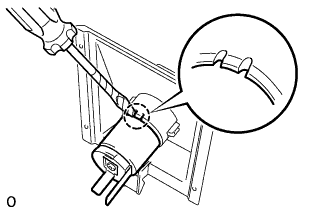 |
Using a screwdriver, detach the claw and remove the power outlet socket.
- HINT:
- Tape the screwdriver tip before use.
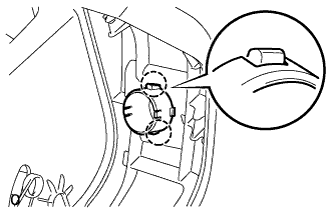
| 4. REMOVE POWER OUTLET SOCKET COVER |
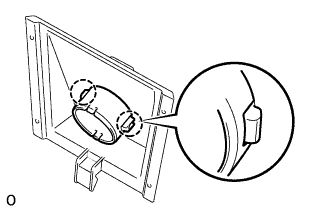 |
Detach the 2 claws and remove the power outlet socket cover.
| 5. REMOVE REAR CONSOLE END PANEL SUB-ASSEMBLY (for Double Cab) |
Using a moulding remover, detach the 7 clips and remove the end panel.
 |
except Regular Cab:
Detach the 2 wire harness clamps and disconnect the connector.
| 6. REMOVE REAR POWER OUTLET SOCKET ASSEMBLY (for Double Cab) |
 |
Using a screwdriver, detach the claw and remove the power outlet socket.
- HINT:
- Tape the screwdriver tip before use.
| 7. REMOVE REAR POWER OUTLET SOCKET COVER (for Double Cab) |
 |
Detach the 2 claws and remove the power outlet socket cover.