TRANSMISSION CONTROL CABLE (for Floor Shift Type) > INSTALLATION |

for Preparation Click here
| 1. INSTALL TRANSMISSION CONTROL CABLE ASSEMBLY |
 |
Insert the transmission control cable from the vehicle interior, and install the cable retainer with the 2 bolts.
- Torque:
- 5.5 N*m{ 56 kgf*cm , 49 in.*lbf }
Connect the transmission control cable to the shift lever retainer, and install a new clip.
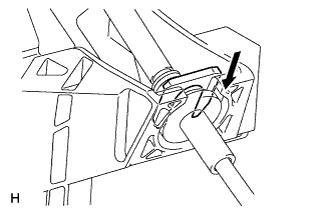 |
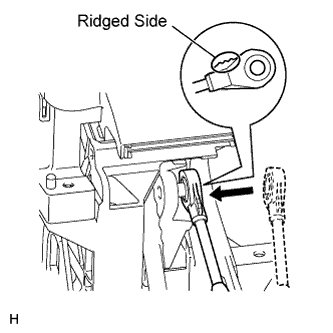
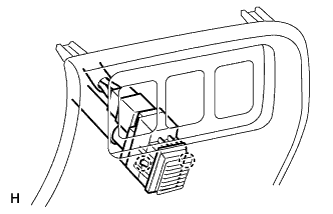
Connect the control cable end to the shift lever.
- NOTICE:
- Make sure to connect the cable end so that the inner cable is not twisted. Confirm that the ridged side of the cable end is facing upward.
 |
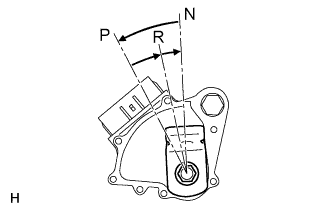
Move the shift lever to N.
Turn the control shaft lever counterclockwise until it stops, and then turn it clockwise 2 notches to set it to the N position.
 |
Connect the control cable with a new clip and the nut.
- Torque:
- 13 N*m{ 133 kgf*cm , 10 ft.*lbf }
- NOTICE:
- When connecting the cable to the transmission control shaft lever, make sure the L bracket of the cable faces the inside of the vehicle.
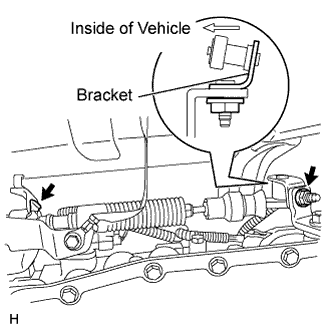 |
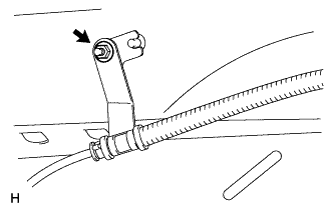
Connect the transmission control cable support with the nut.
- Torque:
- 5.4 N*m{ 55 kgf*cm , 48 in.*lbf }
 |
| 2. ADJUST SHIFT LEVER POSITION |
Move the shift lever to N.
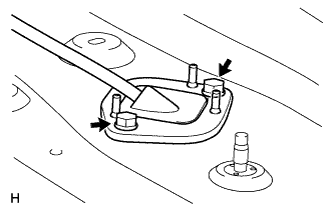
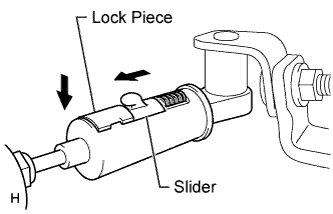
Fold back the transmission control cable adjust case cover. Then while sliding the slider toward the cable end side, press out the lock piece from the back side to release the lock.
 |
Check that the spring of the adjust case is applying enough tension to the shift control cable. Then press in the lock piece to set the lock.
- NOTICE:
- Use your hand to push in the lock piece. Do not use any tools.
- Securely push in the lock piece so that the protrusion of the slider is above the lock piece.
 |
Return the cover of the adjust case to its original position.
Inspect the shift lever operation after the adjustment.
| 3. INSPECT SHIFT LEVER POSITION |
When moving the shift lever from N to other positions, check that the lever can be moved smoothly and accurately to each position and that the position indicator comes on in accordance with the shift lever position.
If the indicator and shift lever position do not match, carry out the following adjustment procedures.
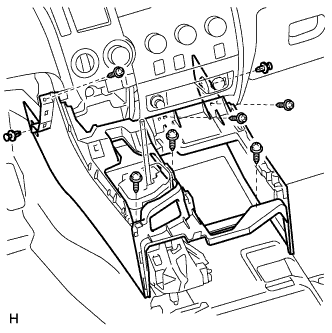
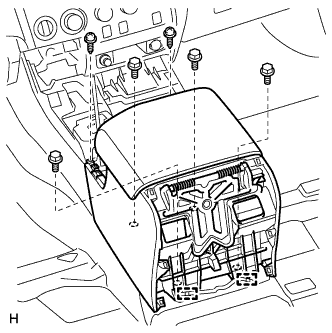
| 4. INSTALL FRONT CONSOLE BOX |
Install the front console box with the 6 screws and 2 clips.
 |
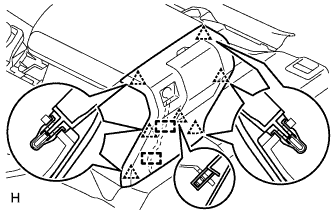
| 5. INSTALL REAR CONSOLE BOX ASSEMBLY |
Install the rear console box with the 2 screws and 4 bolts.
 |
Attach the 2 wire harness clamps.
| 6. INSTALL CONSOLE BOX CARPET |
| 7. INSTALL REAR CONSOLE END PANEL SUB-ASSEMBLY |
except Regular Cab:
Attach the 2 wire harness clamps and connect the connector.
 |
Attach the 7 clips to install the end panel.
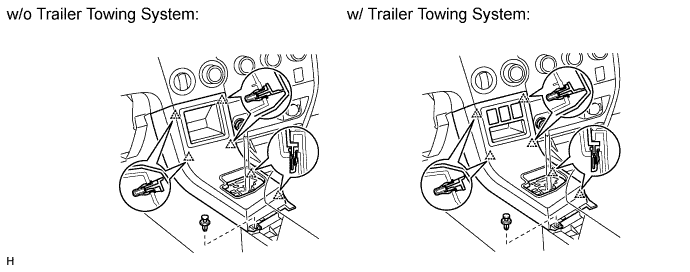
| 8. INSTALL REAR UPPER CONSOLE PANEL SUB-ASSEMBLY |
w/ Trailer Towing System:
Connect the connector.
Attach the 6 clips to install the console panel.
Install the clip.
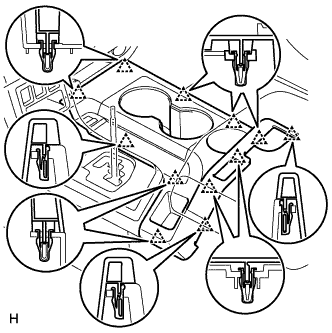
| 9. INSTALL UPPER CONSOLE PANEL SUB-ASSEMBLY |
Attach the 12 clips to install the console panel.
 |
| 10. INSTALL LOWER INSTRUMENT PANEL FINISH PANEL SUB-ASSEMBLY LH |
for Automatic Air Conditioning System:
Attach the 2 claws to install the sensor.
 |
Connect the connectors.
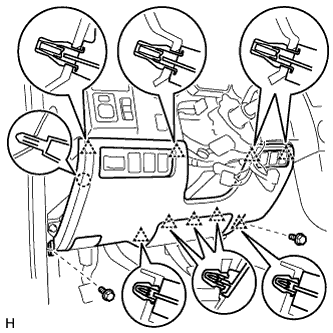 |
Attach the 9 clips and claw to install the finish panel.
Install the 2 bolts.
Install the hood lock control lever.
| 11. INSTALL COWL SIDE TRIM BOARD LH |
 |
Attach the 2 clips to install the cowl side trim board.
Install the clip.
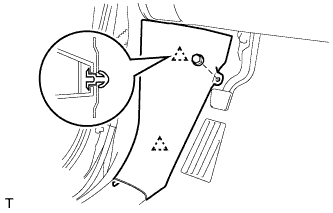
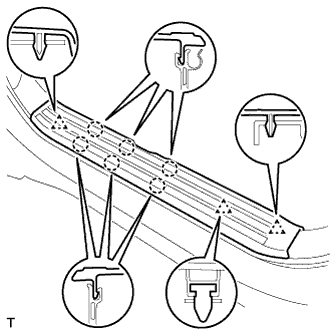
| 12. INSTALL FRONT DOOR SCUFF PLATE LH (for Double Cab, CrewMax) |
 |
Attach the 6 claws and 3 clips to install the front door scuff plate.
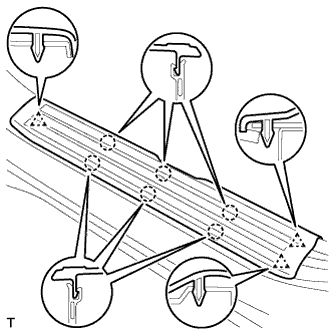
| 13. INSTALL FRONT DOOR SCUFF PLATE LH (for Regular Cab) |
 |
Attach the 6 claws and 3 clips to install the front door scuff plate.