FRONT DOOR BELT MOULDING (for CrewMax) > INSTALLATION |

for Preparation Click here
- HINT:
- Use the same procedures for the RH side and LH side.
- The procedures listed below are for the LH side.
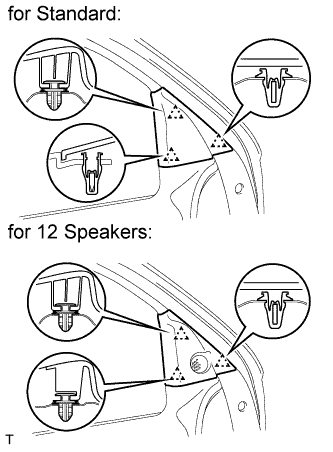
| 1. INSTALL FRONT OUTER DOOR GLASS WEATHERSTRIP ASSEMBLY LH |
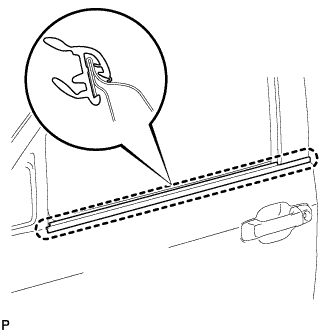 |
Attach the claw to install the weatherstrip.
| 2. INSTALL OUTER REAR VIEW MIRROR ASSEMBLY LH |
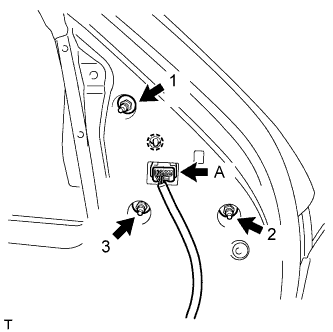 |
Temporarily install the mirror by inserting the claw on the mirror into the holes on the vehicle.
Tighten the 3 nuts in the sequence shown in the illustration and install the mirror.
- Torque:
- 7.8 N*m{ 80 kgf*cm , 69 in.*lbf }
w/ Power Mirror Control System:
Connect the connector labeled A.
| 3. INSTALL FRONT DOOR TRIM BOARD SUB-ASSEMBLY LH |
Connect the 2 cables to the inside handle.
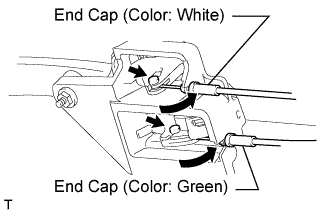 |
Connect the connector.
Attach the inside handle's knob to the door trim board.
Attach the 9 clips to install the door trim board.
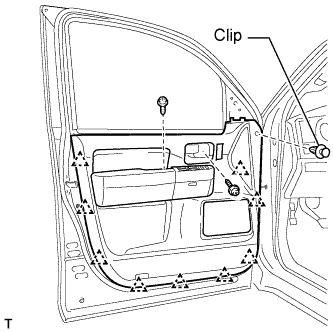 |
Install the inside handle and door trim board to the door trim panel with the screw.
Install the door trim board to the door panel with the screw.
Install the clip.
| 4. INSTALL FRONT DOOR ARMREST COVER LH |
| 5. INSTALL FRONT LOWER DOOR FRAME BRACKET GARNISH LH |
Attach the 3 clips to install the front lower door frame bracket garnish.
 |
| 6. INSTALL FRONT UPPER ARMREST BASE PANEL LH |
Connect the connectors.
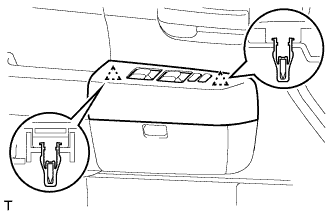 |
Attach the 2 clips to install the front armrest upper base panel.
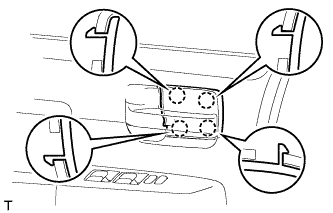
| 7. INSTALL FRONT DOOR INSIDE HANDLE BEZEL PLUG LH |
Attach the 4 claws to install the bezel plug.
 |