BACK DOOR OUTSIDE GARNISH (w/o Tire Carrier) > REMOVAL |

for Preparation Click here
- HINT:
- When removing the emblem, heat the back door outside garnish and emblem using a heat light.
- Standard:
Item Temperature Back door outside garnish 20 to 30°C (68 to 86°F) Emblem 20 to 30°C (68 to 86°F)
- NOTICE:
- Do not heat the back door outside garnish and emblem excessively.
| 1. REMOVE BACK DOOR CENTER GARNISH |
Using a screwdriver, detach the 4 claws and 4 clips and remove the garnish.
- HINT:
- Tape the screwdriver tip before use.
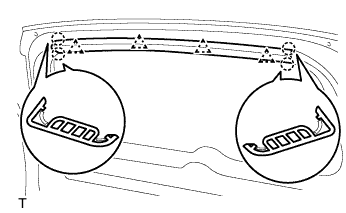 |
| 2. REMOVE BACK DOOR SIDE GARNISH LH |
Using a screwdriver, detach the 2 claws and 2 clips and remove the garnish.
 |
| 3. REMOVE BACK DOOR SIDE GARNISH RH |
- HINT:
- Use the same procedure described for the LH side.
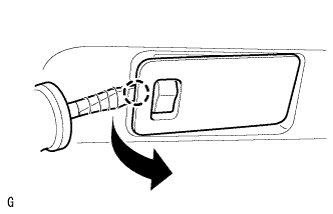
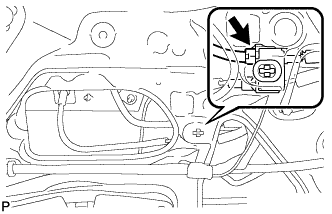
| 4. REMOVE BACK DOOR COURTESY LIGHT ASSEMBLY |
Using a screwdriver, pry out the light as shown in the illustration.
- HINT:
- Tape the screwdriver tip before use.
 |
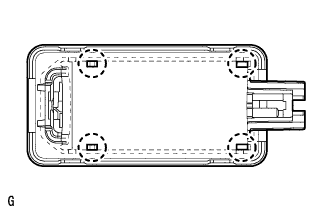
Detach the 4 claws and remove the light shade.
 |
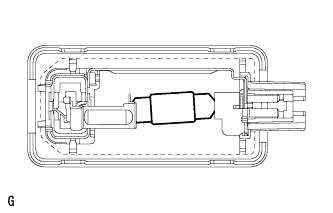
Remove the light bulb from the light.
 |
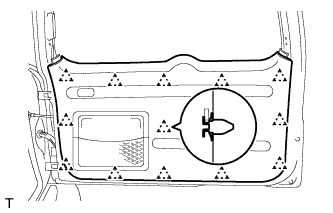
| 5. REMOVE BACK DOOR TRIM BOARD ASSEMBLY |
Using a screwdriver, detach the 13 clips and remove the trim board.
- HINT:
- Tape the screwdriver tip before use.
- If the screwdriver cannot reach the clips, pull on the lower trim to remove it.
 |
Remove the 5 screws and the back door trim pocket.
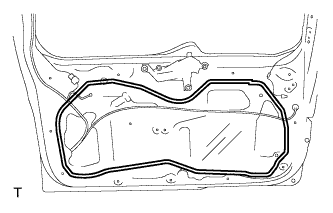
| 6. REMOVE BACK DOOR SERVICE HOLE COVER |
Disconnect each connector and remove the service hole cover.
- HINT:
- Remove the remaining tape on the door.
 |
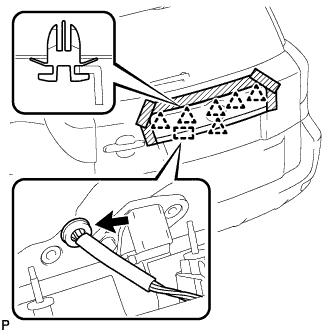
| 7. REMOVE BACK DOOR OUTSIDE GARNISH SUB-ASSEMBLY |
 |
Disconnect the connector.
Put protective tape around the back door outside garnish.
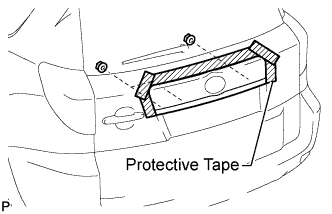 |
Remove the 3 nuts.
Detach the grommet and 5 clips, and remove the back door outside garnish.
 |
| 8. REMOVE LICENSE PLATE LIGHT ASSEMBLY |
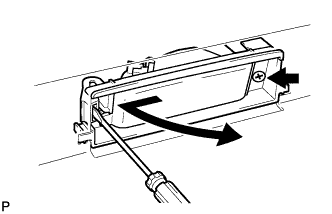 |
Disconnect the connector.
Remove the screw.
Using a screwdriver, remove the light as shown in the illustration.
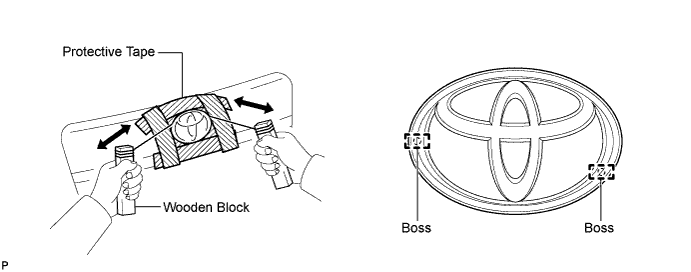
| 9. REMOVE NO. 1 BACK DOOR NAME PLATE |
Put protective tape around the name plate.
Insert a piano wire between the back door outside garnish and name plate.
- HINT:
- Be careful of the boss positions.
Tie objects that can serve as handles (for example, wooden blocks) to both wire ends.
Pull the piano wire and scrape off the double-sided tape that holds the name plate to the back door outside garnish.
- NOTICE:
- Be careful not to damage the back door outside garnish.
Remove the name plate.
| 10. REMOVE LOWER BACK DOOR OUTSIDE GARNISH SUB-ASSEMBLY |
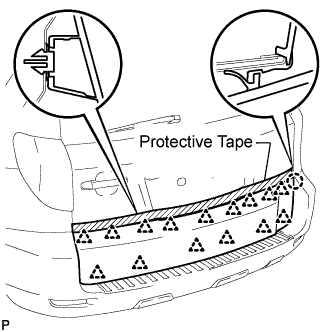 |
Put protective tape around the back door outside garnish.
Detach the 15 clips and claw, and remove the back door outside garnish.
| 11. REMOVE BACK DOOR OUTSIDE GARNISH CLIP |
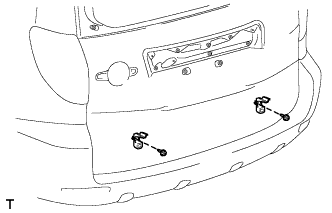 |
Remove the 2 screws and 2 clips.