DRIVE BELT > INSTALLATION |

for Preparation Click here
| 1. INSTALL V-RIBBED BELT |
Install the belt.
| 2. ADJUST V-RIBBED BELT |
Turn bolt C to adjust the tension of the V-ribbed belt.
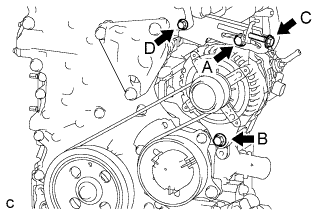 |
Tighten bolts A and B.
- Torque:
- Bolt A:
- 19 N*m{ 190 kgf*cm , 14 ft.*lbf }
- Bolt B:
- 43 N*m{ 438 kgf*cm , 32 ft.*lbf }
- NOTICE:
- Confirm that bolt D is not loosened.
| 3. INSPECT V-RIBBED BELT |
Check the belt for wear, cracks or other signs of damage.
If any of the following defects is found, replace the V-ribbed belt.- The belt is cracked.
- The belt is worn out to the extent that the cords are exposed.
- The belt has chunks missing from the ribs.
- The belt is cracked.
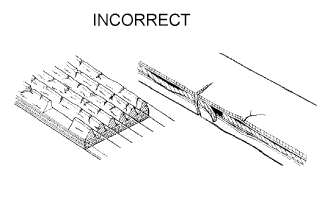 |
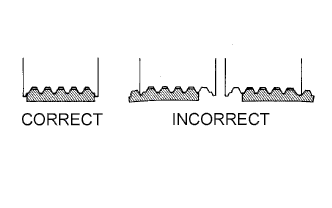
Check that the belt fits properly in the ribbed grooves.
- HINT:
- Check with your hand to confirm that the belt has not slipped out of the groove on the bottom of the pulley. If it has slipped out, replace the V-ribbed belt. Install a new V-ribbed belt correctly.
 |
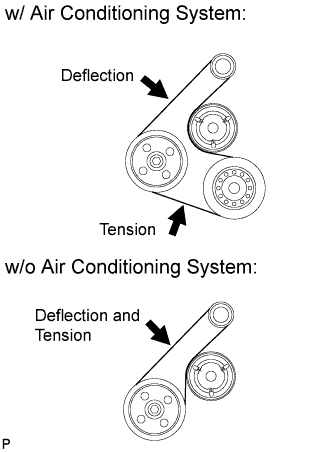
Check the V belt deflection and tension.
- Deflection:
Item Specified Condition New belt 7.0 to 8.2 mm (0.276 to 0.323 in.) Used belt 7.6 to 10.0 mm (0.299 to 0.394 in.)
- Tension:
Item Specified Condition New belt 700 to 800 N (71 to 82 kg, 157 to 180 lb) Used belt 550 to 750 N (56 to 77 kg, 124 to 169 lb)
- HINT:
- When inspecting the V belt deflection, apply 98 N (10 kgf) tensile force to it.
- After installing a new belt, run the engine for approximately 5 minutes and then readjust the tension to (new belt) specifications.
- Check the V-ribbed belt deflection and tension at the specified point.
- V-ribbed belt tension and deflection should be checked after 2 revolutions of the engine.
- V-ribbed belt tension and deflection should be checked at TDC crank angle and cold condition.
- When adjusting a belt, adjust its deflection and tension to the intermediate values of the specification.
- When reinstalling a belt which has been used for over 5 minutes, adjust its deflection and tension to the used belt specification.
- When using a belt tension gauge, confirm its accuracy by using a master gauge first.
- If using a sonic tension meter:
- Weight:
- 15 g/rib*m
- Width:
- 6 ribs
- Span:
- 188 mm (7.40 in.) (w/ air Conditioning)
- 282 mm (11.1 in.) (w/o air Conditioning)
 |
| 4. INSTALL ENGINE UNDER COVER RH |
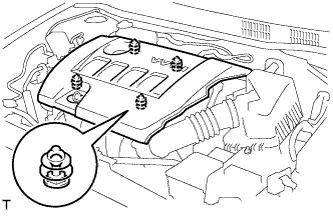
| 5. INSTALL NO. 2 CYLINDER HEAD COVER |
Engage the 4 clips to install the No. 2 cylinder head cover.
- NOTICE:
- Be sure to engage the clips securely.
- Do not apply excessive force or do not hit the cover to engage the clips. This may cause the cover to break.
 |